| |
The final wash in a university photo lab. Well, we don't really need a lab. A kitchen sink, dining room table and dark closet will do. |
As with almost anyting photographic, one has to invest in some supplies and equipment to make Cyanotype prints. For starters, the process is relatively inexpensive if one lives in a climate where sun exposures can be made. If that is not possible some kind of UV expoosure unit is required. Here is some good info concerning exposure times in various parts of the world. Since I am fortunate enought to use sunlight, I will not address UV units. If you think you need one, best thing is to do some research on the internet. |
The digital original and the b&w conversion.
I did mine in PS and with nik filters. Don't be put off by that though. It can be done in almost any photo imaging software, even free ones like PhotoScape.
|
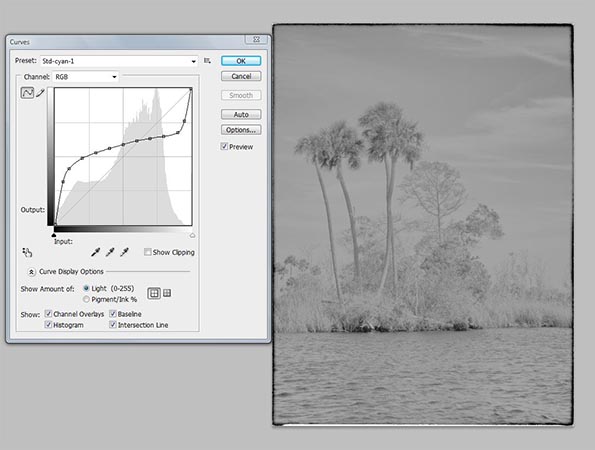
If you can work with curves, go to Peter Mrhar's website and download his Average Cyanotype Curve and apply it to your positive image. It will look rather strange as you can see above. If you can't apply curves try and make the positive look as overexposed and low contrast till it looks like mine above. |
Once the positive is inverted to creat a negative, it must also be flipped horizontally so that when it is contact printed, emulsion to emulsion, the image will come out with the correct orientation.
|
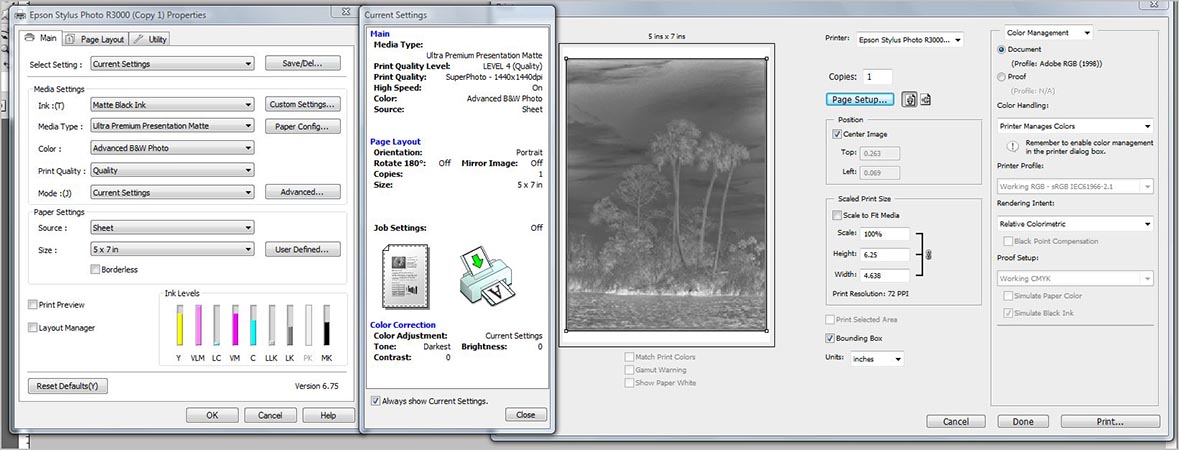
I print with an Epson Stylus Photo R3000. If you use another printer I am sure you can make up a 'work-around' and come up with similar settings and results.
I print with matte black ink. That seems counter-intuitive since the printing will be done on OHP Tansparency Film, but trust me, it works.
|
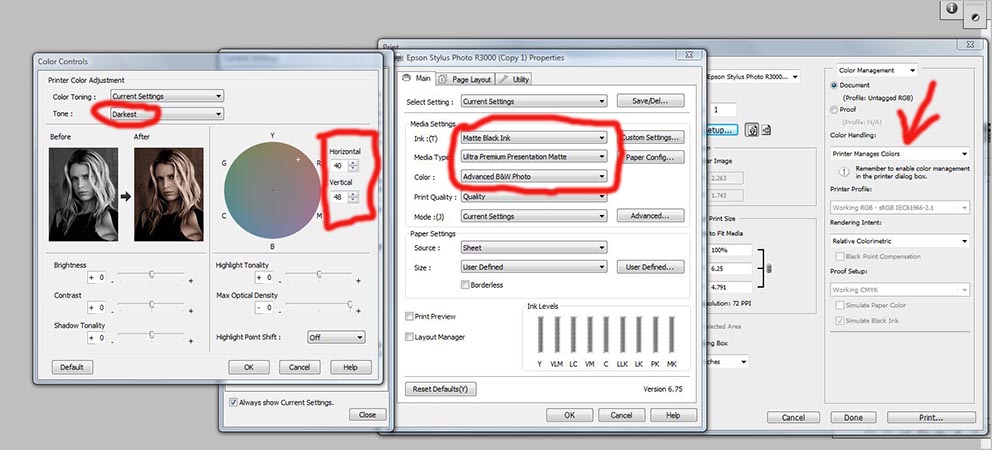
Here are my printer settings for making the digital negative for Cyanotype printing. From right to left. I set my dialog box so that Printer Manages Color is selected. On this Epson printer that means I can now print in the Advanced Black & White mode. Opening up the AWB panel - on the left - I set the Horizontal value to 40 and the Vertical value to 48. This will give my print the brownish look represented by the right photo of the young woman. That photos is part of the AWB panel and other than showing the hue of the prospective print, has nothing to do with the image to be printed. That is, it alwyas is that same picture.
Now, if you don't have an Epson with ABW settings, just tone your print/negative so that it will have this sort of sepia look. Or you can get a bit more technical about the whole thing and print out a spectrum file, make test prints, and all that. On my blog I have an article that explains the whole procedures with links and credits.
You can also simply go to Peter Mrhar's website and download all that stuff!
|
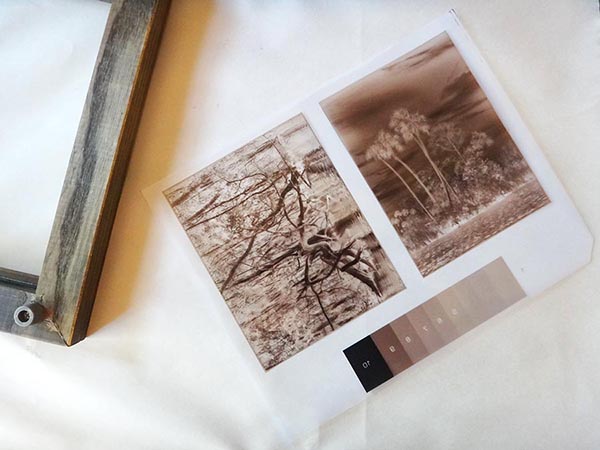
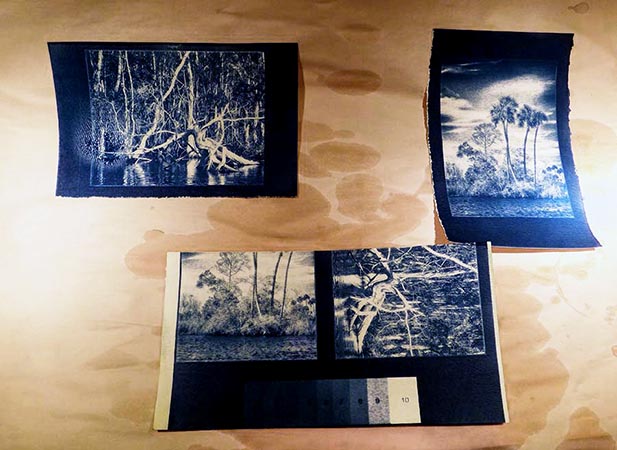
Here is a photo of a couple of my digital negatives printed on one piece of OHP Film together with a step table. You can make your own step table or again, go to Peter Mrhar's site and download to your heart's content! |
|
Although I use lots of different papers for my Cyanotype printing, I found the Canson Montval paper to be the best, all-around paper.
|
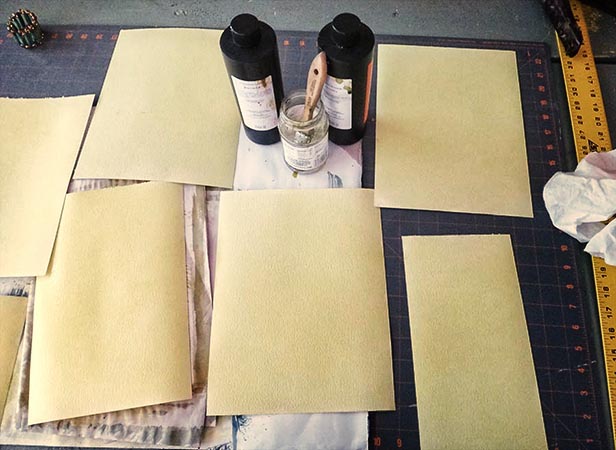
Coating several sheets of watercolor paper on our dining room table, by the window, using the pre-mixed Photographers Formulary Cyanotype Kit, a cheap bristol prush and an old jar for mixing equal parts of chemistry. After the sheets of paper are coated they go into a dark closet to dry for about 90 minutes.
|
Sun exposure in the backyard.
|
Developing/washing print in kitchen sink. I drilled some small holes in the plastic bucket so that the washwater can circulate around the print.
|
Washed print in dish rack to drip dry.
|
Prints drying on pad of newsprint prior to being flattened overnight between some heavy books
|
This digital negative was done using Dan Burkholder's color table method, which goes back to 1999. It was the first technique I used to make digital negs, and it is still a good, simple way to do them. |
|
|
|